2011年3月31日 星期四

[Android] Create a new NDK project by yourself

Let's create a new project, and try to mimic the hello-jni.
before the exercise, assume you've already installed NDK.
If not, see the article first.
http://twnin.blogspot.com/2011/03/how-to-use-ndk-android-ndk-rb5.html

---------------------

As usual, create a new Android project
open Eclipse
Files->New->Project->Android Project
Project Name: PlayJni
Build Target: Android 2.2
Application name: PlayJni
Package name: com.play.PlayJni
Create Activety: PlayJni
Min SDK Version: 8
Click 'Finish'

---------------------------
Then, create necessary file for jni.
Right click on project name.
New->folder
Folder name: jni

Right click on project name.
New->file
Select folder: PlayJni/jni
File name: myJni.c

Right click on project name.
New->file
Select folder: PlayJni/jni
File name: Android.mk

Now, you'll see the 'Package Explore' as below.


------------------------------

open PlayJni/jni/myJni.c
Paste the code
#include <string.h>
#include <jni.h>

jstring Java_com_play_PlayJni_PlayJni_stringFromJNI( JNIEnv* env, jobject thiz )
{
    return (*env)->NewStringUTF(env, "Hello from JNI by myself!");
}

open PlayJni/jni/Android.mk
Paste the script

LOCAL_PATH := $(call my-dir)
include $(CLEAR_VARS)
LOCAL_MODULE    := myJni
LOCAL_SRC_FILES := myJni.c

include $(BUILD_SHARED_LIBRARY)
modify PlayJni.java

@Override
    public void onCreate(Bundle savedInstanceState) {
        super.onCreate(savedInstanceState);
        setContentView(R.layout.main);
        TextView tv = (TextView)this.findViewById(R.id.TextView1);
        tv.setText(stringFromJNI());
    }
   
    public native String stringFromJNI();
    static {
        System.loadLibrary("myJni");
    }
 ---------------------------

execute cygwin
Go to 'jni' subdirectory of your project directory.
cd /cygdrive/c/workspace/PlayJni/jni/
ndk-build
like this


launch emulator and run project

[Android] How to use NDK (android-ndk-rb5)

Note how to use NDK in this article.
reference from http://cheng-min-i-taiwan.blogspot.com/2010/06/android-ndk-hellojni.html

-------------------
According to system requirement, we have to install cygwin first.
http://developer.android.com/sdk/ndk/overview.html#reqs

Go to cygwin official website to get cygwin and setup it.
http://cygwin.com/install.html

If you are first time to use cygwin, you'll been asking to select which package you want to setup at the same time.
All we have to select is
  • Devel/gcc
  • Devel/gcc-core
  • Devel/gcc-g++
  • Devel/gcc-mingw-core
  • Devel/gcc-mingw-g++
  • Devel/make
  • Devel/mingw-runtime
-------------------
Next, we should download the NDK from Android website. (I download android-ndk-r5b for windows)
http://developer.android.com/sdk/ndk/index.html

Decompress NDK into cygwin install folder.  (I install at C:\cygwin\)
Execute cygwin for establish folder C:\cygwin\home\[your username]
Use notepad edit file C:\cygwin\home\[your username]\.bash_profile
Append text at last of file

PATH=/android-ndk-r5b:${PATH}
NDK_ROOT=/android-ndk-r5b
NDK_Sample=/android-ndk-r5b/samples
export PATH NDK_ROOT NDK_Sample


Restart cygwin program
Go to folder which you want to build  cd /android-ndk-r5b/samples/hello-jni/
Input command ndk-build


-------------------

Next, we should install Eclipse CDT(C/C++ Development Tool)
Open Eclipse, Help->Install New Software->Add->Achive
Name: CDT
Location: http://download.eclipse.org/tools/cdt/releases/galileo


Choice packages
• Eclipse C/C++ Development Tools
• CDT GNU Toolchain Build Support
• CDT GNU Toolchain Debug Support
• CDT Utilities
• Eclipse C/C++ Development Platform


Then restart Eclipse


-------------------

Now, getting start with project hello-jni
File->New->Project->Android Project
Choice Create project from existing source
Location Choice C:\cygwin\android-ndk-r5b\samples\hello-jni
Build Target Choice Android 2.2


If you've execute ndk-build at the project
It will appear the libs subdirectory.


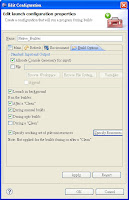
Setting Builder
Right click mouse on project name
Properties -> Builders -> New-> Program
in label Main
  • Name: Native_Builder
  • Location: C:\cygwin\bin\bash.exe
  • Working Directory: C:\cygwin\bin
  • Arguments: --login -c "cd $NDK_Sample/hello-jni && ndk-build"
in label Fresh
Check "Refresh resources upon completion"
Choice Specific resources, then check HelloJni\libs


in label Build Options
check Allocate Console
check Launch in background
check After"Clean"
check During manual builds
check During auto builds
check Specify working set of relevant resources,Choice Specify Resources then check HelloJni\jni


Click Apply,OK,OK
If it has be setted correctly, you'll look the message in Console perspective.

Gdbserver : [arm-linux-androideabi-4.4.3] libs/armeabi/gdbserver
Gdbsetup : libs/armeabi/gdb.setup
Install : libhello-jni.so => libs/armeabi/libhello-jni.so

 --------------------------------

Now, let's run the project!


2011年3月29日 星期二

[Android] Copy & Paste (for Android 2.x only)

I design two EditText control, and menu for copy and paste.
User can input text at the first EditText control, then click menu 'Copy'.
As long as user click the menu 'Paste', the same text would paste into the second EditText.


We should give id to EditText for access the control in 'res/layout/main.xml'.

<EditText
android:layout_height="wrap_content"
android:layout_width="fill_parent"
android:id="@+id/editText1"android:hint="input text here"
/>
<EditText
android:layout_height="wrap_content"
android:text=""
android:layout_width="fill_parent"
android:id="@+id/editText2"
android:hint="text will be paste in here."
/>


When user select menu item, let do something...

@Override
public boolean onMenuItemSelected(int featureId, MenuItem item)
{
 //ClipboardManager object can easily manage copy and paste.
ClipboardManager clipboard = (ClipboardManager) getSystemService(Context.CLIPBOARD_SERVICE);

switch(item.getItemId())
{
case (MENU_COPY):
    clipboard.setText(mEditText1.getText());
case (MENU_PASTE):
    mEditText2.setText(clipboard.getText());
}

return super.onMenuItemSelected(featureId, item);
}

2011年3月22日 星期二

Bitmap Format

Note how to read bitmap data
Reference from http://crazycat1130.pixnet.net/blog/post/1345538

-----------------------------
Overview Bitmap Byte File

bitmap file make up of four parts
  • Bitmap File Header
  • Bitmap Info Header
  • Color Table (Palette)
  • Bitmap Array
All words was shown in little-endian mode.
It's mean if value is 0x1234, you will look it display 0x3412.
example shown as a 8X8 pixels all fill red color bitmap file


Bitmap File Header
0000h - 0001h : Identifier  ('BM') [1]
0002h - 0005h : File Size (byte)
0006h - 0009h : Reserved
000Ah - 000Dh : Bitmap Data Offset

Example: 


0000
42

Identifier BM
42H=66D='B' , 4DH=77D='M'
0001
4D
0002
F6

because Little-Endian, so writing F6000000H

File Size 246 byte
F6H=246D
Header 54 + Content 192 (8 X 8 X 3) = 246
0003
00
0004
00
0005
00
0006
00
Reserved

0007
00
0008
00
0009
00
000A
36
Bitmap Data Offset 54 byte
It's also mean the size of file header
000B
00
000C
00
000D
00


Annotations
【1】This field includes verious code for identify type of bitmap:
    'BM' - Windows 3.1x, 95, NT, ...    
        'BA' - OS/2 Bitmap Array    
        'CI' - OS/2 Color Icon    
        'CP' - OS/2 Color Pointer    
        'IC' - OS/2 Icon    
        'PT' - OS/2 Pointer


to be continue...